Section 3 · The ALPS window
A tour, once, so the rest of the manual can name things without explaining them again.
ALPS has one window. Down the left is a rail of eleven destinations; across the top is a menu bar. Everything else is whichever destination you are in.
3.1 The rail — the eleven screens
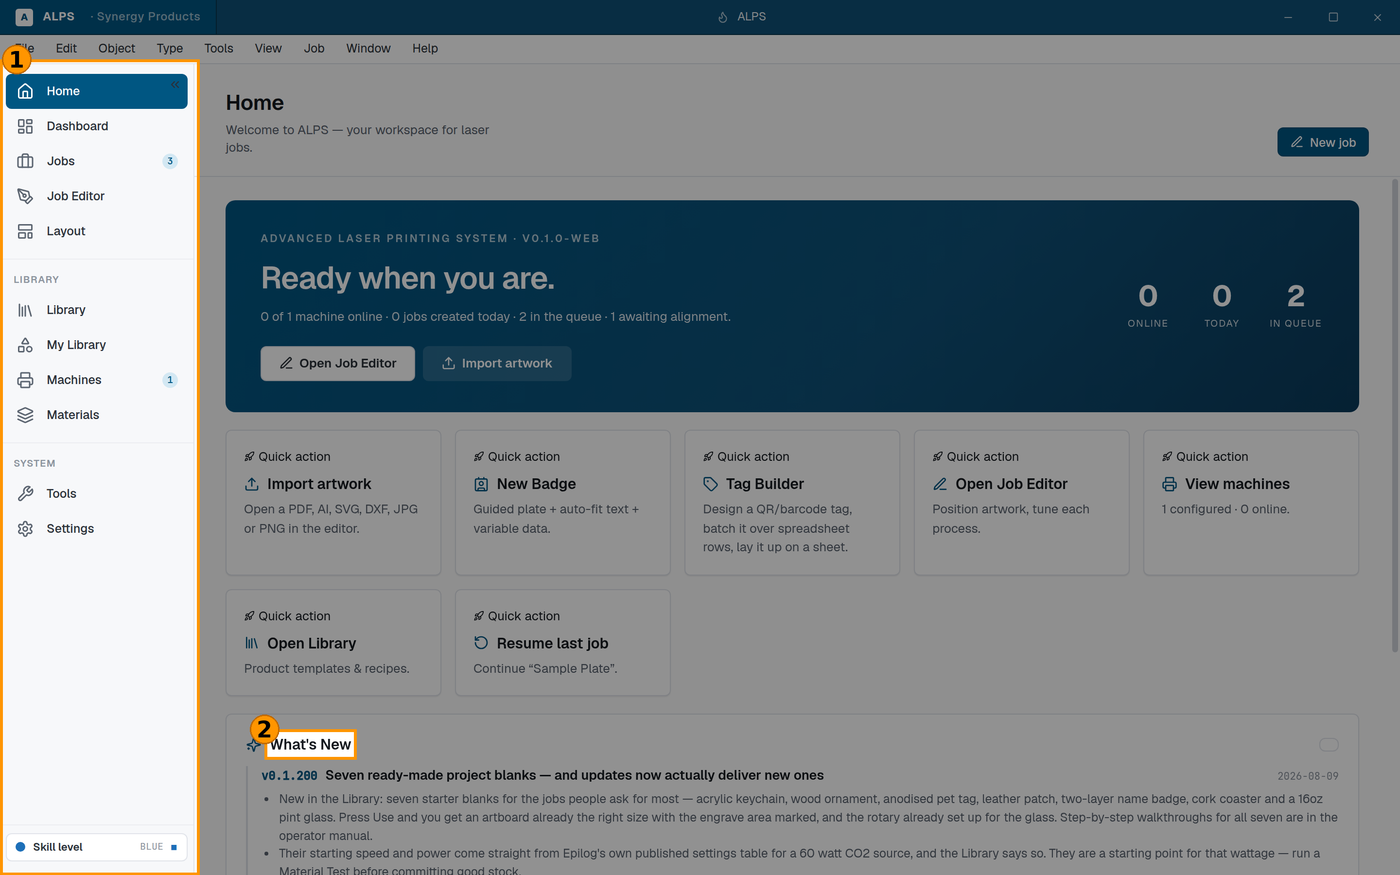
① The rail — every screen lives here ② What's New for the version you are running
⭐ Only three of these are where you spend real time: Job Editor, Tools, and Jobs. The rest are places you visit, set up, and leave. Knowing which is which saves a lot of clicking around looking for something that was never there.
| screen | what it is for |
|---|---|
| Home | where you land. Recent jobs, and what changed in this version |
| Dashboard | an overview of activity |
| Jobs | every job — queued, running, finished. ⭐ Also where Open… takes you |
| Job Editor | the artwork and its processes. This is the main screen |
| Layout | gang several different jobs onto one bed, to fill a sheet |
| Library | shared templates and saved designs |
| My Library | your own saved artwork, added from the editor or imported directly |
| Materials | the material library — settings by material and thickness |
| Machines | your lasers: adding, editing, bed size, wattage, camera |
| Tools | the wizards and generators. See Section 9 |
| Settings | everything configurable. See Section 11 |
⚠ Library and My Library are different screens, and the similar names catch people out. Library is shared material; My Library is yours.
3.2 The menu bar
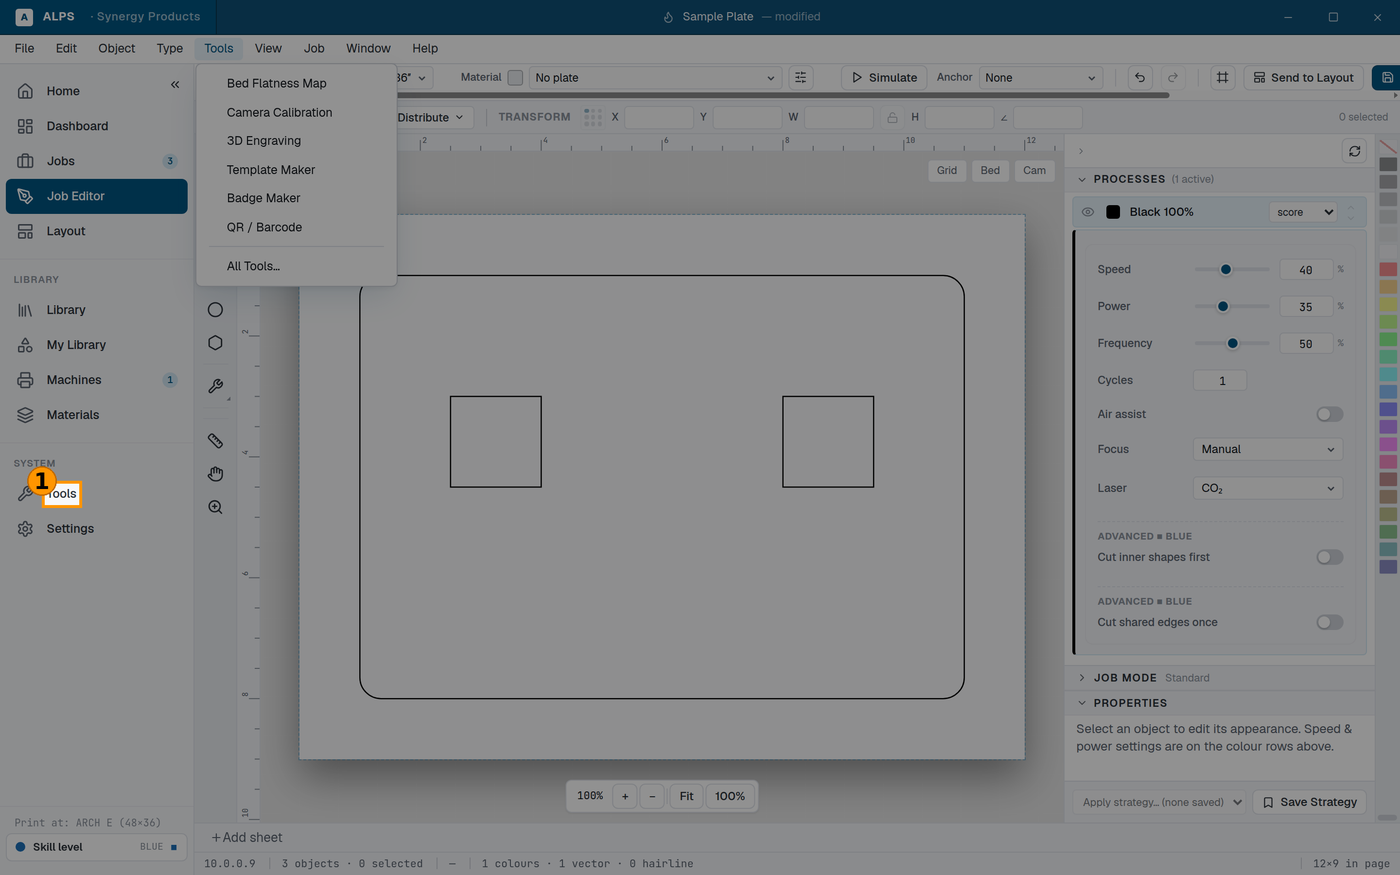
The menu bar follows a drawing program's layout, so CorelDRAW and Illustrator users already know it
File · Edit · Object · Type · Tools · View · Job · Window · Help
⚠ These follow the layout of a drawing program deliberately, so anyone coming from CorelDRAW or Illustrator finds them where they expect. If you know one of those, you already know this menu bar.
⭐ Help ▸ About ALPS gives you the version — and the Help menu shows it inline without opening anything, next to Documentation. That is the first thing support will ask you for, so it is worth knowing it is two clicks away. (It is also at Settings ▸ About, if you are already there.)
⚠ The menu bar is hidden while a full-screen wizard is open. That is deliberate — a wizard is modal and has its own Cancel — so if the menus have vanished, close the wizard rather than looking for a setting.
3.3 The Job Editor's own tools list
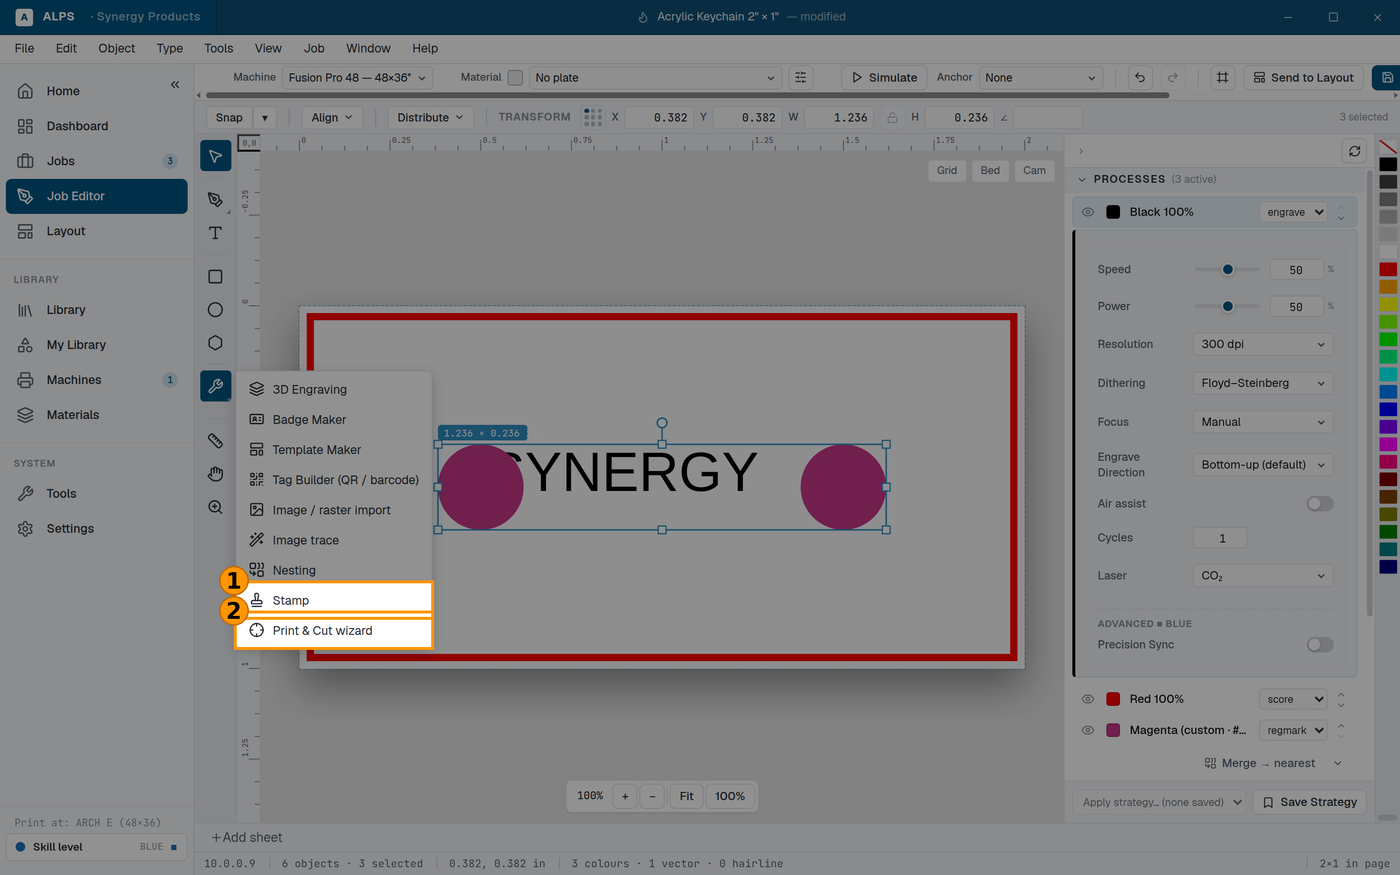
① The wrench in the editor's toolbar opens this — the design-time tools, where you are designing ② The same tools are on the Tools screen under "In the Job Editor"
⭐ A shortcut, not a separate set. In the Job Editor's left-hand toolbar there is a wrench icon holding the tools you reach for while designing — so you do not have to leave the canvas to get at them. Every one of them is also on the Tools screen, under In the Job Editor, and clicking it there brings you back here with the tool open.
At Blue level it holds: 3D Engraving, Badge Maker, Template Maker, Tag Builder (QR / barcode), Image / raster import, Image trace, Nesting, Stamp and the Print & Cut wizard. ⚠ Like everywhere else, the list is filtered by your skill level, so a lower tier shows fewer.
⛔ Stamp is a placeholder. Opening it says so: "Stamp Mode ships in a later release." The automated shoulder-angle / relief-depth pipeline is planned, not built. ⭐ For a rubber stamp today, the panel gives you the real answer: import your artwork, mirror it, and engrave at your material's stamp preset. It is listed here because you will find it and wonder.
⭐ The Tools screen is the complete index. If ALPS can do it, it is listed there — the wrench is a shortcut to the design-time subset, not a second, hidden set of features.
⚠ This changed in 2026-08. Older builds really did hide Print & Cut, Badge Maker, Template Maker, Nesting, Image trace and Stamp from the Tools screen, and operators reasonably concluded ALPS did not have them. If you are on an older version and cannot find one, look under the wrench.
3.4 Keyboard shortcuts
Anywhere in the application:
Ctrl+N |
New job |
Ctrl+O |
Open… |
Ctrl+I |
Import artwork… |
In the Job Editor:
Ctrl+Z |
Undo |
Ctrl+Shift+Z |
Redo |
Ctrl+X Ctrl+C Ctrl+V |
Cut · Copy · Paste |
Ctrl+D |
Duplicate |
Ctrl+A |
Select All |
Del |
Delete |
Ctrl+G |
Group |
Ctrl+U |
Ungroup |
Ctrl+K |
Break Apart |
Esc |
Cancel what you are doing |
| arrow keys | nudge the selection |
⭐ Ctrl+K (Break Apart) is the one worth remembering, because it has no obvious equivalent
elsewhere: it splits converted text or a compound shape back into its separate pieces. When a logo
imports as one stubborn object and you need to colour part of it differently — which is how you make
part of it cut and part of it engrave — this is the key.
⚠ Shortcuts do not fire while you are typing in a box. Click away from a field first.
⚠ On a Mac, Cmd works wherever this manual says Ctrl.
3.5 Skill level changes what you can see
If a tool or a setting described in this manual is not on your screen, your skill level is below it — nothing is broken and nothing is missing.
Change it in Settings ▸ General. See About this manual for what the four levels are.
⭐ This is worth checking before concluding a feature does not exist. It is the commonest cause of "I can't find it", and it is a one-click fix.