Material Test
Tools ▸ Material Test · any machine
What it does
It burns a grid of squares on one sheet, where every square uses a different combination of settings. You look at the result, pick the square you like, and that is your setting.
Rows vary one parameter, columns vary another, and everything else is held constant — so the grid changes exactly two things at a time and you can actually read which one did what.
Why you'd want it
It is the fastest honest way to find settings for a material you have not run before. The alternative is guessing, running a part, adjusting, running another part — which burns more material than the test does and gives you a worse answer, because you changed one thing at a time in your head while the material changed too.
⭐ Each square is its own process. That is not a detail — it is why the grid is trustworthy. The machine genuinely applies each combination rather than ramping between them, so square 12 is really 60 % power at 40 speed, not something on the way there.
Step by step
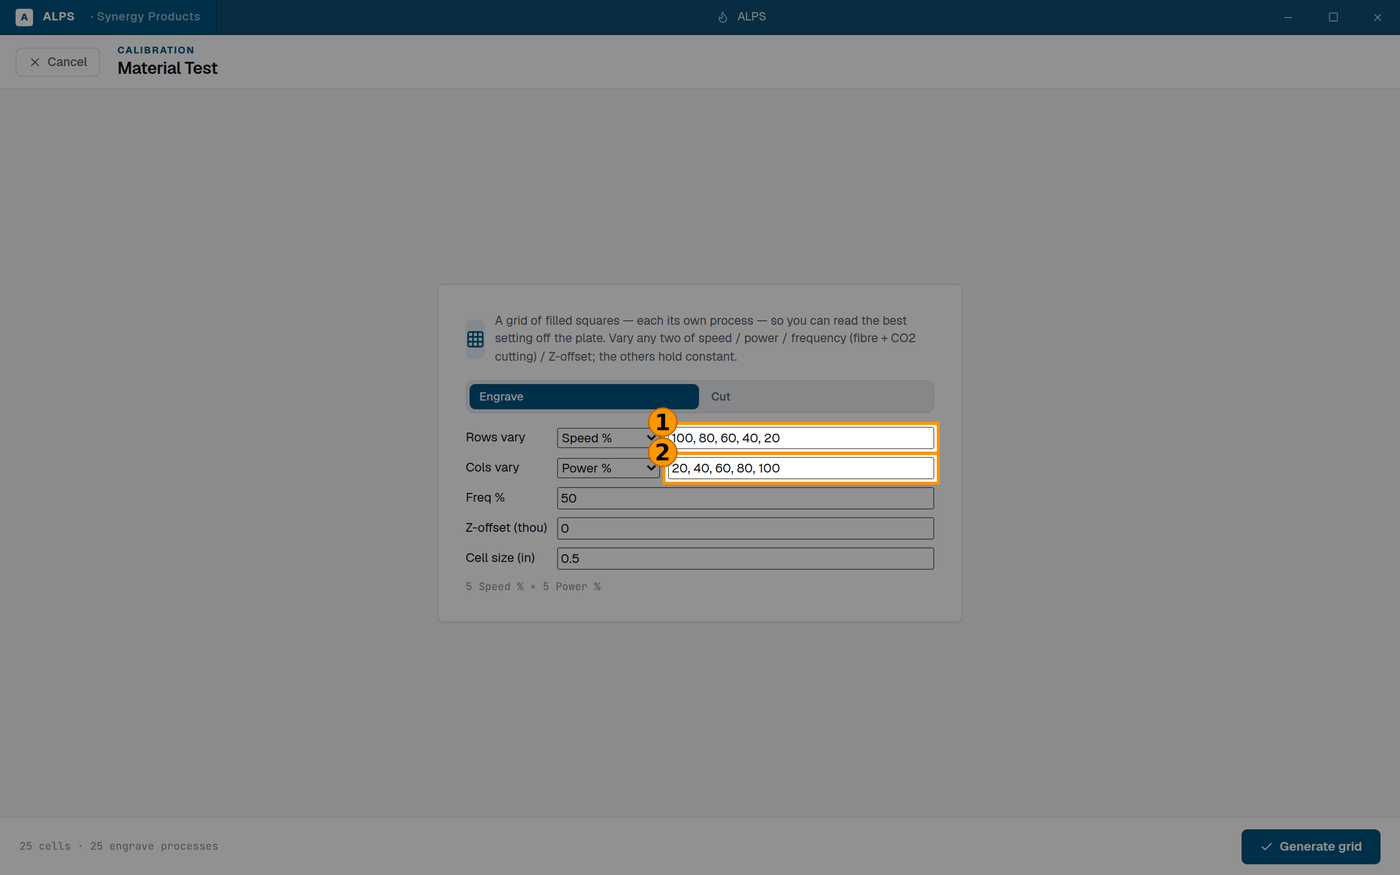
① Rows vary one setting… ② …columns vary another — every square is its own process
- Open Tools ▸ Material Test.
- Choose Test mode — Engrave or Cut. They are different questions and a grid tuned for one tells you little about the other.
- Pick what Rows vary and what Cols vary. The choices are speed,
power, frequency and offset.
- Picking a parameter that is already on the other axis swaps them rather than leaving you with the same one twice.
- Enter the values for each axis as a plain list — e.g.
100, 80, 60, 40, 20down the rows and20, 40, 60, 80, 100across the columns. - Set anything left over under hold constant. Whatever you do not vary, you are choosing — leaving it blank is still a decision.
- Set Cell size (in). Half an inch is a sensible default; go bigger if you need to judge surface finish rather than just "did it cut through".
- Generate grid. It lands in the editor as a normal job, so you can position it on your offcut before sending.
The panel shows the total number of squares as you edit, which is the honest check on whether your grid is going to take four minutes or forty.
Reading the result
- For cutting: the useful square is the slowest, lowest-power one that still separates cleanly. Anything more is heat you are putting into the part for nothing — more taper, more discolouration, more chance of flare.
- For engraving: judge it under the light you will actually inspect parts under. A finish that looks perfect under a bright bench lamp can look patchy on a shelf.
- Photograph the sheet next to its settings. The grid is only useful later if you can still tell which square was which, and an unlabelled test sheet in a drawer is scrap.
⚠ What it does not tell you
- It does not tell you dimensions. A square that looks right is not a measurement — kerf still moves your finished size. If the part has to fit something, cut one and measure it.
- It is specific to that material, thickness and lens. A different batch of the "same" acrylic can genuinely need different settings, and a different lens certainly does.
- It does not know about your air assist or extraction. Change those and the grid you ran last month is a rough guide, not an answer.
Related
- DPI Test Sheet (Tools ▸ DPI Test Sheet) — ramps 300→1200 DPI on one sheet to find the sharpest resolution for a material. Different question from speed and power.
- Dithering Comparison — eight algorithms side by side, for photo engraving.
- 3D Engraving (
3d-engraving.md) — worth running a material test first, so you commit a good blank rather than discovering the material on a 40-minute job.